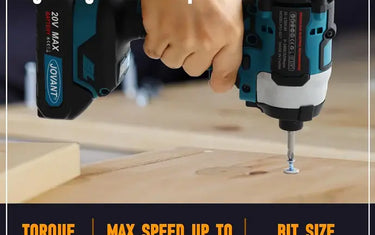
How to Build a Rotating Bit Holder Stand
Level up your workspace organization with this practical, customizable tool storage solution
A well-organized workspace is the foundation of every successful project. Today, we're walking you through a DIY rotating bit holder stand that combines JOVANT's signature durability with hands-on creativity. Whether you're a weekend warrior or a seasoned professional, this build delivers professional-grade storage without the premium price tag.
What You'll Need
Materials
| Item | Specification | Quantity |
|---|---|---|
|
Circular wooden discs |
Ø100mm × 20mm thick |
4 pieces |
|
Square wooden plates |
100mm × 100mm × 12mm thick |
2 pieces |
|
Rectangular wooden strip |
100mm × 500mm × 12mm thick |
1 piece (optional side support) |
|
Round steel rod |
Ø8mm × 490mm length |
1 piece |
|
Retaining rings (circlips) |
7mm inner diameter |
10 pieces |
JOVANT Tools Required
· JOVANT Cordless Drill Driver — for precise drilling and assembly
· JOVANT Drill Bit Set — 8mm wood bit + assorted driver bits
· JOVANT Orbital Sander — for smooth, professional finishes
· JOVANT Sandpaper Assortment — 120-grit and 240-grit
· Steel ruler, pencil, center punch
· Hacksaw or JOVANT Angle Grinder
· Bench vise (for securing workpieces)
Pro Tip: Using matched JOVANT tools ensures optimal performance and extends the life of both your tools and your build.
 >
>
Step-by-Step Build Guide
Step 1: Prepare the Wooden Components
Top and Base Plates (Square)
Mark the center of each 100mm × 100mm plate using diagonal lines. Secure your JOVANT Cordless Drill with an 8mm bit, set the depth stop to 5mm, and drill a clean blind hole at the intersection.
⚠️ Critical: Do not drill through—this hole guides the steel rod while maintaining a finished surface.
Storage Discs (Circular)
00001. Drill a through-hole (8mm) at the exact center of each disc
00002. Using driver bits as templates, mark evenly spaced holes around the perimeter
00003. Drill to 10mm depth—deep enough for secure bit storage, shallow enough to preserve structural integrity
Step 2: Achieve a Professional Finish
|
Stage |
Grit |
Technique |
|
Rough sanding |
120 |
Remove tooling marks, level surfaces |
|
Fine finishing |
240 |
Create smooth, splinter-free edges |
The JOVANT Orbital Sander's variable speed control prevents over-sanding and ensures uniform results across all surfaces.
Step 3: Prepare the Steel Shaft
Mark your 490mm rod at 100mm intervals:
0 100 200 300 400 490
← 1mm grooves for retaining rings
Secure in a bench vise and cut 1mm-deep grooves with a hacksaw. These grooves lock your storage discs at precise heights.
Step 4: Assembly
Build from the bottom up:
Top cap (blind hole faces down)
← Level 4: Circular storage disc
← Level 3
← Level 2
← Level 1
← Base plate (blind hole faces up)
Steel shaft with retaining rings at each level
00001. Thread discs onto the shaft, seating a retaining ring in each groove
00002. Slide top and base plates into position
00003. Drive JOVANT wood screws through the square plates into disc edges for rotational stability
Final Assembly Check
✅ All retaining rings seated firmly in grooves
✅ Discs rotate smoothly without wobble
✅ Top and base plates perpendicular to shaft
✅ No exposed splinters or sharp edges